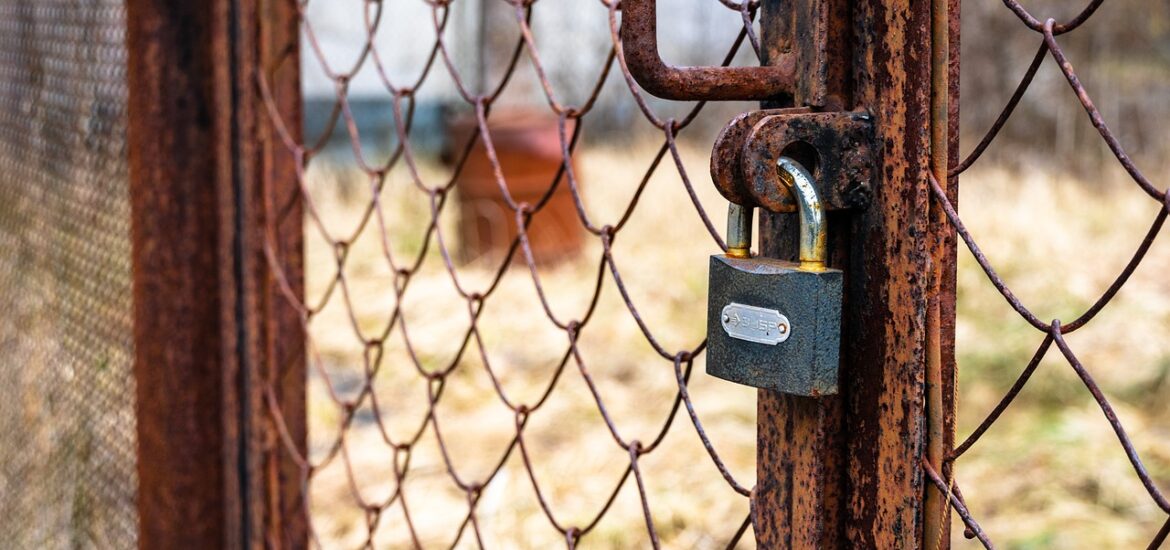
Everything You Need to Know About Warehouse Doors

Warehouse doors are the gateway to your storage and distribution operations. Whether it’s for receiving shipments, securing valuable inventory, or maintaining energy efficiency, choosing the right type of warehouse door plays a vital role in the performance and safety of your facility. With many options available on the market, understanding warehouse doors is crucial for making the best decision for your business.

1. Importance of Choosing the Right Warehouse Door

A warehouse door is more than just an entrance or exit point. It:

  • Secures your goods and personnel.
  • Protects the premises from weather and intruders.
  • Facilitates smooth logistic operations.
  • Enhances energy efficiency.
  • Complies with safety and industrial regulations.

A poorly selected or maintained door can lead to frequent repairs, energy loss, and security breaches.

2. Common Types of Warehouse Doors

Here are the main types of doors used in warehouses:

a. Roll-Up Doors

Also known as coiling doors, these are made of steel or aluminum slats that roll into a coil above the doorway. These doors are excellent for space-saving and are often used in high-traffic areas.

Pros:

  • Durable and weather-resistant.
  • Compact design.
  • Easy to automate.

Cons:

  • Higher initial cost.
b. Sectional Overhead Doors

These are commonly seen in logistics and industrial settings. They open by sliding up along tracks, usually powered by electric motors.

Pros:

  • Excellent insulation.
  • Good for large openings.
  • Quiet operation.

Cons:

  • Requires overhead clearance.
c. High-Speed Doors

Made for efficiency, these doors open and close rapidly to minimize energy loss and maximize workflow.

Pros:

  • Energy-efficient.
  • Great for temperature-controlled environments.
  • Reduces air contamination.

Cons:

  • Requires frequent maintenance in high-use areas.
d. Sliding Doors

Usually made of metal or heavy-duty plastic, sliding doors open horizontally and are used where space allows lateral movement.

Pros:

  • Simple mechanism.
  • Good for wide entrances.

Cons:

  • Not suitable for small entry points.
  • Limited insulation.
e. Fire-Rated Doors

These doors are engineered to resist fire and help in containing it, giving staff time to evacuate.

Pros:

  • Essential for safety compliance.
  • Fire and smoke protection.

Cons:

  • Heavier and may require specialized installation.

3. Key Factors to Consider Before Buying

When selecting a warehouse door, it’s important to evaluate your operational needs. Here’s what to look for:

a. Size and Opening Frequency

For warehouses with constant in-and-out movement, high-speed doors or roll-up doors are ideal. For occasional access, sectional or sliding doors may suffice.

b. Security Needs

If your facility stores valuable goods, invest in strong materials like steel or reinforced aluminum, along with tamper-proof locking systems.

c. Thermal Insulation

In temperature-sensitive environments, doors with high R-value (insulating capacity) help maintain internal climate and reduce energy costs.

d. Automation and Accessibility

Automatic doors with remote operation enhance productivity, reduce manual handling, and improve safety.

e. Compliance with Building Codes

Ensure the selected door meets all local fire safety, security, and disability compliance requirements.

4. Benefits of Quality Warehouse Doors

Investing in a good warehouse door offers multiple advantages:

  • Reduced Energy Bills: Insulated doors prevent energy loss.
  • Operational Efficiency: Faster access saves time.
  • Lower Maintenance Costs: Durable materials mean fewer repairs.
  • Improved Security: Sturdy doors deter unauthorized access.
  • Employee Safety: Safety features protect workers from accidents.

5. Maintenance Tips for Longevity

To ensure your warehouse doors last and function optimally, follow these maintenance tips:

  • Regular Inspections: Check for rust, misalignment, or worn-out parts.
  • Lubrication: Apply grease to tracks, rollers, and hinges periodically.
  • Cleanliness: Remove dirt and debris that could affect operation.
  • Professional Servicing: Have a technician perform a comprehensive check annually.
  • Replace Weather Seals: Damaged seals can compromise insulation and allow pests.

6. Signs It’s Time to Replace Your Warehouse Door

Even with the best care, doors wear out over time. Here are signs you may need a replacement:

  • Excessive noise during operation.
  • Frequent breakdowns and repairs.
  • Visible cracks or dents.
  • Poor insulation or air leakage.
  • Difficulty in opening or closing.

If your door poses a safety risk or hampers workflow, consider an upgrade.

7. Cost Considerations

Warehouse door costs vary depending on size, material, features, and installation. On average:

  • Basic manual roll-up doors may start from ₹40,000 to ₹60,000.
  • High-speed or fire-rated doors can cost ₹1,00,000 or more.

Always include installation, automation systems, and future maintenance in your budgeting.

8. Customization Options

Modern doors can be customized to meet aesthetic and operational needs. Customizations may include:

  • Color matching with brand theme.
  • Windows for natural light.
  • Smart sensors for automated entry.
  • Remote access via mobile apps.

9. The Role of Technology in Modern Warehouse Doors

With the rise of smart technology, warehouse doors are evolving:

  • IoT Integration: Smart doors can alert users of malfunctions or unauthorized access.
  • Biometric Access: Fingerprint and face recognition systems for secure entry.
  • Cloud Monitoring: Track door usage and schedule maintenance from a dashboard.

These upgrades not only enhance security but also provide valuable data insights.

Conclusion

Choosing the right warehouse door is a strategic decision that affects safety, energy use, and workflow efficiency. With so many styles and features available, it’s important to understand your facility’s specific requirements. From roll-up doors for high-traffic areas to fire-rated doors for safety compliance, every option offers unique benefits.

Don’t underestimate the power of a reliable warehouse door, it’s the first line of defense and efficiency in any logistics operation. Invest in a quality door today, and you’ll see long-term returns in security, productivity, and peace of mind.

How To Install A Door Latch On Bedroom and Bathroom Doors? A DIY Guide

Whether you’re upgrading your home, improving privacy, or fixing a broken latch, learning how to install a door latch on bedroom and bathroom doors is a useful DIY skill. With a few tools, a little patience, and this step-by-step guide, you’ll be able to complete the task like a professional.

Let’s walk through the entire process from choosing the right latch to testing the final installation.

Why Install a Door Latch?

Door latches are essential for:

  • Privacy: Especially in bedrooms and bathrooms.
  • Security: Prevents unwanted entry.
  • Convenience: Helps keep the door closed without locking.

Over time, door latches can become loose, corroded, or misaligned. Installing a new one enhances functionality and adds to the aesthetics of the door.

Tools and Materials You Will Need

Before beginning, gather the following tools and materials:

  • Door latch set (includes latch, faceplate, and strike plate)
  • Screwdriver or drill
  • Screws (usually included in latch pack)
  • Chisel and hammer
  • Pencil
  • Measuring tape or ruler
  • Utility knife (optional)
  • Wood filler (optional, for old holes)

Optional:

  • Hole saw (if installing on a new door without any cuts)
  • Door latch installation kit (for precision)

Step 1: Choose the Right Latch Set

There are different types of latches:

  • Passage latches for bedrooms (no lock)
  • Privacy latches for bathrooms (includes a locking mechanism)
  • Mortise latches (for older or high-end doors)

Choose a style and finish that matches your door’s hardware.

Step 2: Measure and Mark the Door

If you’re installing a latch on a new door:

Measure 36 inches (91 cm) from the bottom of the door. This is the standard latch height.

Use a pencil to mark the height on the door edge and the door face.

Place the latch template (if provided) on your marks.

If replacing an existing latch, skip this step and proceed with removing the old hardware.

Step 3: Drill the Latch Hole and Face Hole (New Doors Only)

Use a hole saw or spade bit to drill a hole through the door face for the knob or lever.

Drill a smaller hole into the door edge for the latch bolt.

Be sure both holes intersect cleanly and align properly.

This step is not needed if your door is pre-drilled or if you’re just replacing a latch in the same spot.

Step 4: Fit and Install the Latch

Insert the latch into the hole on the door edge.

Trace around the latch faceplate with a pencil.

Use a chisel to carefully carve out a shallow recess so the latch faceplate sits flush with the door edge.

Screw the latch into place using the screws provided.

Make sure the sloped side of the latch bolt faces the direction the door closes.

Step 5: Install the Knob or Handle

Insert the interior and exterior knobs or levers through the hole in the door.

Align them with the latch mechanism.

Secure them with screws through the faceplate or mounting plate.

Test the handle to ensure smooth operation.

If your set includes a privacy lock for bathrooms, make sure the locking mechanism is functioning correctly.

Step 6: Mark and Cut the Strike Plate Area

Close the door and observe where the latch bolt hits the door frame.

Mark this point on the frame and align the strike plate accordingly.

Use a chisel and utility knife to carve a shallow recess for the strike plate.

Drill small pilot holes for the screws.

Secure the strike plate with screws.

Check that the latch bolt enters the strike plate hole smoothly. If it sticks, adjust the plate or deepen the latch hole.

Step 7: Test the Installation

  • Open and close the door several times.
  • Ensure the latch fits smoothly into the strike plate.
  • Test any locking features for bathroom latches.
  • Tighten any loose screws.

Tips for a Successful Installation

  • Use sharp tools to avoid damaging wood around the latch.
  • Pre-drill screw holes to prevent wood splitting.
  • If replacing an old latch, check for wear or alignment issues in the door frame.
  • For doors with previous holes, use wood filler to fix gaps before installing the new latch.

Common Mistakes to Avoid

  • Wrong latch orientation: Always ensure the sloped side of the bolt faces the direction of door closure.
  • Over-chiseling the recess: This can weaken the door edge and create gaps.
  • Misaligned strike plate: Leads to latch not catching properly.
  • Not checking measurements: Standard backsets are usually 2-3/8″ or 2-3/4″. Make sure you match your door’s measurement.

When to Call a Professional

While installing a door latch is relatively simple, you may need expert help if:

  • The door is misaligned and not closing properly.
  • You’re working on antique or custom doors.
  • You’re installing electronic or smart locks requiring wiring.

In these cases, hiring a joiner, locksmith, or handyman could save time and prevent costly errors.

Final Thoughts

Installing a door latch on a bedroom or bathroom door is a manageable task that can be completed in under an hour. Whether you’re doing it for privacy, security, or aesthetics, a properly installed latch ensures that your door works smoothly and reliably.

By following this guide step-by-step, even a novice DIYer can handle the project with confidence. With the right tools, a little attention to detail, and a steady hand, you’ll have your latch installed and working like a charm.

Top Features to Look for in a Stair Gate

When it comes to childproofing your home, stair gates are one of the most essential safety products every parent should consider. Whether you have a curious toddler eager to explore or a small pet prone to wandering, stair gates provide a reliable barrier to prevent accidents on staircases. However, with countless options available on the market, choosing the right stair gate can feel overwhelming. To make an informed decision, it’s important to know the features that truly matter. In this blog, we’ll explore the top features to look for in a stair gate to ensure both safety and convenience for your family.

1. Safety Certification

The first feature to prioritize when buying a stair gate is safety certification. Always check whether the gate complies with recognized safety standards. For example, in the UK, look for the BS EN 1930:2011 certification, which indicates the product has passed rigorous safety tests for child protection. A certified stair gate guarantees it has been tested for strength, durability, and resistance to pressure, ensuring it won’t easily fail when your child leans or pushes against it.

2. Strong and Durable Material

The material of the stair gate plays a huge role in its effectiveness. Metal gates, often made of steel, are strong, durable, and able to withstand significant force. Wooden gates can also be sturdy while blending well with traditional home décor. Plastic gates may be lightweight but often lack the same long-term durability. Ideally, choose a gate made of metal or hardwood if safety is your top priority, especially for the top of stairs where accidents can be most dangerous.

3. Pressure-Mounted vs. Hardware-Mounted

One of the key decisions when selecting a stair gate is whether to go for a pressure-mounted or hardware-mounted design.

  • Pressure-mounted gates use tension to stay in place and are easy to install without drilling holes. These are ideal for doorways and bottom-of-stair placements but are not recommended for the top of stairs as they can be dislodged if pushed hard enough.
  • Hardware-mounted gates require screws and brackets to be fixed into the wall or banister. They take more effort to install but are much more secure, making them the best option for the top of stairs where extra safety is needed.

If your primary concern is keeping children safe from falling down stairs, hardware-mounted is the way to go.

4. One-Handed Operation

As any parent knows, you’ll often be carrying your child, laundry, or groceries while navigating your home. That’s why stair gates with one-handed operation are a lifesaver. Look for models with easy-to-use locking mechanisms that allow you to open and close the gate with one hand, but still require enough skill to prevent young children from figuring them out. This feature adds both convenience and practicality to everyday use.

5. Auto-Close Feature

An often-overlooked feature is the auto-close mechanism. Some stair gates are designed to swing shut automatically after you walk through them. This prevents situations where you accidentally leave the gate open, defeating its purpose. An auto-close gate ensures the barrier is always in place, offering peace of mind even during hectic moments.

6. Wide Walk-Through Space

Not all gates are designed with convenience in mind. Some can feel narrow and awkward to pass through, especially when carrying bulky items. Opt for a stair gate with a wide walk-through opening. This makes it easier for adults to move around while still keeping children and pets secure. Gates with a double-door opening or extra-wide design are especially helpful in busy households.

7. Adjustable Width

Every home is different, and staircases or doorways come in various sizes. Look for a stair gate with an adjustable width or one that includes extensions. Adjustable gates save you the hassle of finding a perfect fit for your space, while extensions allow you to adapt the gate for wider staircases or open-plan designs. This flexibility makes them more cost-effective in the long run.

8. Height of the Gate

The height of a stair gate is also an important consideration. Toddlers grow quickly, and a short gate may soon become ineffective if your child learns to climb over it. Most stair gates are around 29–36 inches tall, but if you have particularly active children or large pets, consider choosing a taller model for added security.

9. Dual Locking Mechanism

A dual or double locking system adds an extra layer of protection. This means that even if your child manages to tamper with one part of the lock, there’s a secondary mechanism preventing the gate from opening. Some stair gates require a push-and-lift action, while others use sliding buttons combined with lifting. This added complexity ensures little ones cannot easily figure it out, while adults can still open it quickly with practice.

10. Swing Direction Control

Some stair gates allow you to control the swing direction of the gate. For example, you may want the gate to only open away from the staircase for safety reasons. This feature prevents the gate from accidentally swinging over the stairs, reducing the risk of falls. It’s especially useful for top-of-stairs installations where extra caution is needed.

11. Aesthetic Appeal

While safety is the main concern, it’s natural to want your stair gate to fit in with your home’s décor. Many modern stair gates come in sleek designs and neutral colours such as white, black, or natural wood finishes. Some even feature minimalist, contemporary styles that blend seamlessly into modern homes. Choosing a visually appealing gate ensures you won’t feel like the safety feature is an eyesore in your living space.

12. Ease of Installation

Parents don’t always have the tools or time for complicated installations. If you’re not keen on drilling, a pressure-mounted option is quicker and easier to install. Hardware-mounted gates usually come with clear instructions and templates for alignment, but it’s worth checking whether professional installation is recommended for your chosen model. Ease of installation saves stress and ensures the gate is secure from day one.

13. Portability

Some families prefer stair gates that can be easily removed and transported. If you travel often or want to move the gate between rooms, look for lightweight gates designed for portability. Foldable or retractable stair gates are also good options for flexible use.

14. Retractable Stair Gates

For households that prefer a minimalist look, retractable stair gates are an excellent choice. These gates roll back into a compact housing when not in use, keeping your space open and uncluttered. They’re ideal for parents who want both safety and flexibility, although they may not be as durable as metal or wooden options.

Conclusion

Choosing the right stair gate is all about balancing safety, convenience, and style. Features such as safety certification, durability, one-handed operation, auto-close functions, adjustable width, and swing direction control all play a vital role in keeping your little ones safe while maintaining practicality for everyday use. By prioritizing these key features, you can find a stair gate that not only protects your toddler from dangerous staircases but also fits seamlessly into your home.

A well-chosen stair gate gives parents peace of mind, allowing children the freedom to explore safely within boundaries. After all, childproofing isn’t just about restricting movement, it’s about creating a secure environment where your little one can grow and thrive without unnecessary risks.

How To Maintain Your Digital Rim Lock For Longevity

In the era of smart security solutions, digital rim locks have gained popularity for their sleek design, convenience, and added security features. However, like all mechanical and electronic devices, digital rim locks require regular maintenance to function efficiently over time. Whether you’re a homeowner, landlord, or office manager, understanding how to properly care for your digital rim lock can extend its life, save on repair costs, and ensure your property stays secure.

This blog explores essential maintenance tips, common pitfalls to avoid, and best practices to help your digital rim lock last longer.

What is a Digital Rim Lock?

A digital rim lock is a surface-mounted locking system that combines mechanical and electronic locking mechanisms. Unlike traditional deadbolts or mortice locks, rim locks are usually installed on the surface of the door and latch onto a keeper on the door frame.

Digital rim locks often come with features such as:

  • PIN code access
  • RFID or card-based entry
  • Biometric fingerprint recognition
  • Remote control or Bluetooth connectivity
  • Emergency key override

These smart devices offer enhanced convenience and improved security, making them ideal for residential and light commercial use.

Why Maintenance Matters

Despite being designed for durability, digital rim locks are exposed to environmental factors, power sources, and human usage, all of which can degrade their performance over time. Here’s why maintenance is crucial:

  • Security Assurance: A faulty lock can compromise your home or office security.
  • Cost Efficiency: Regular upkeep reduces the need for costly replacements or repairs.
  • Extended Lifespan: A well-maintained lock can last years without needing a replacement.
  • User Satisfaction: Smooth functionality enhances the user experience and reliability.

1. Clean the Lock Regularly

Dust and debris can accumulate on both the mechanical and electronic parts of a digital rim lock. Use a soft, dry cloth to wipe the external surface of the lock every couple of weeks. Avoid using water or harsh chemical cleaners, as they may damage sensitive electronic components.

Pro Tip: For fingerprint scanners, use a microfiber cloth slightly dampened with water to remove oils or smudges.

2. Check the Battery Status

Most digital rim locks run on AA or AAA batteries and display a low battery warning through beeping sounds or LED indicators. Make it a habit to check battery levels monthly, and replace them with high-quality alkaline batteries as needed.

Important Note: Avoid using rechargeable batteries unless specified by the manufacturer, as their voltage is usually lower than regular alkaline batteries.

3. Test All Entry Methods

Digital rim locks often offer multiple entry methods PIN, RFID, biometric, and mechanical keys. At least once a month, test each method to ensure they’re functioning correctly. For example:

  • Try multiple fingerprints if the lock supports them.
  • Ensure the key override mechanism is working and accessible.
  • Swipe all registered RFID tags or cards to verify recognition.

4. Protect Against Moisture and Weather

If your lock is installed on an exterior door, it’s essential to protect it from rain, direct sunlight, and high humidity. Although many digital rim locks are weather-resistant, constant exposure to extreme elements can wear them down.

Install a protective cover or choose a lock specifically rated for outdoor use (IP65 or above). Also, consider installing a canopy or door awning for extra protection.

5. Keep Firmware Updated (If Applicable)

Some advanced digital rim locks come with connectivity features and companion apps that require occasional firmware updates. These updates can:

  • Patch security vulnerabilities
  • Improve performance
  • Fix software bugs

Always download firmware from the official manufacturer’s website or app store and follow the update instructions carefully.

6. Lubricate Mechanical Parts

While you should avoid spraying lubricant directly into the electronic parts, the mechanical latch and keyhole (if present) can benefit from occasional lubrication. Use a graphite-based lubricant instead of oil-based sprays like WD-40, as the latter can attract dust and grime.

Apply a small amount to the latch mechanism and keyhole once every 6 months to ensure smooth operation.

7. Manage User Access

Over time, the list of registered users can become outdated. Former tenants, employees, or house guests might still have access unless their credentials are deleted.

  • Review and update the user list quarterly.
  • Remove old fingerprints, PIN codes, and RFID tags.
  • Assign access only to trusted individuals.

This not only ensures optimal security but also prevents the lock’s memory from becoming overloaded.

8. Handle the Lock Gently

While digital locks are built for regular use, rough handling can damage both the internal components and external casing. Teach all users to:

  • Gently close the door to avoid jarring the lock
  • Enter PIN codes or place fingers on scanners with care
  • Avoid pressing buttons or keypads with sharp objects

Proper usage reduces wear and tear significantly.

9. Perform a Full Diagnostic (Yearly)

Once a year, perform a full diagnostic check:

  • Inspect screws and mounting plates to ensure everything is tight and aligned.
  • Check door alignment and make sure the latch fits smoothly into the keeper.
  • Verify all alert sounds and lights are functioning properly.
  • Check for signs of corrosion, rust, or water ingress.

Some digital rim locks come with a built-in diagnostic mode—refer to your user manual to activate it.

10. Refer to the User Manual

This might sound obvious, but many issues can be prevented simply by reading the instruction manual that came with your lock. Manufacturers often provide specific maintenance advice tailored to the lock’s design and components.

Store the manual in a safe place or keep a digital copy for quick reference when needed.

When to Call a Professional

If you notice recurring issues such as:

  • The lock not recognizing valid fingerprints or PINs
  • Batteries draining unusually fast
  • The lock making strange noises or flashing error lights

It’s best to contact the manufacturer’s customer service or a certified locksmith who specializes in digital locks. Avoid DIY repairs on internal circuitry unless you’re trained to do so.

Final Thoughts

Digital rim locks offer a blend of convenience, style, and modern security. But just like any investment in your home or office, they require attention and care. By incorporating simple habits like cleaning, battery checks, firmware updates, and periodic inspections, you can ensure that your digital rim lock remains reliable and secure for years to come.

Regular maintenance not only protects your property but also saves you from unnecessary stress and costs in the future. A little effort today goes a long way in safeguarding your tomorrow.

How to Maintain Your Security Screen Doors: A Complete Guide

Security screen doors are a valuable investment for any homeowner seeking enhanced protection, ventilation, and style. Designed to keep intruders out while allowing fresh air in, these doors combine strength with aesthetics. However, like any other element of your home, regular maintenance is essential to keep them functioning effectively and looking great.

Neglecting your security screen doors can lead to rust, malfunctioning locks, or mesh damage compromising both safety and appearance. In this blog, we’ll walk you through everything you need to know to properly maintain your security screen doors, ensuring they remain in peak condition for years to come.

1. Understand the Components of Your Security Door

Before diving into maintenance tips, it’s important to know the key parts of a security screen door:

  • Frame – Usually made of steel or aluminum, providing structural strength.
  • Mesh or grille – Stainless steel mesh, aluminum, or decorative grille that offers protection while allowing visibility and airflow.
  • Locks and handles – Multi-point or deadlock systems for security.
  • Hinges and closers – Enable smooth door operation.
  • Weatherstrips and seals – Keep out dust, insects, and drafts.

Each of these components needs specific care, which we’ll detail below.

2. Clean the Door Frame Regularly

Dust, moisture, and pollution can accumulate on the door frame, especially if your door is exposed to the elements.

Steps:

  • Use a soft cloth or sponge with mild detergent and warm water.
  • Wipe down the frame thoroughly, paying attention to corners where grime builds up.
  • Rinse with clean water and dry with a soft towel.

Frequency:

  • Once every 1–2 months for coastal or industrial areas.
  • Once every 3 months for suburban homes.

Avoid abrasive cleaners or steel wool as they can damage protective coatings or scratch the surface.

3. Maintain the Mesh or Grille

The mesh is your first line of defense against insects and break-ins. Keeping it clean helps preserve visibility and airflow.

For Stainless Steel Mesh:

  • Vacuum gently with a brush attachment.
  • Wipe using a microfibre cloth soaked in water and mild detergent.
  • Rinse and pat dry.

For Decorative Grilles:

  • Use a soft brush to remove dust from intricate designs.
  • Avoid pressure washing, as it may damage paint or finishes.

Pro Tip: Check for dents or signs of corrosion, especially in humid areas.

4. Lubricate Locks and Hinges

Stiff locks or squeaky hinges are not only annoying, they can also signal wear and reduce door functionality.

Steps:

  • Apply a graphite-based lubricant or silicone spray to locks.
  • Avoid oil-based products like WD-40, which can attract dust and gum up mechanisms.
  • For hinges, use silicone spray and wipe away any excess.

Frequency:

  • Every 3–6 months or when resistance is noticed.

Ensure keys turn smoothly and latches engage without force.

5. Inspect and Maintain Door Closers

Many security screen doors include automatic door closers to prevent slamming. If the door is closing too slowly or too quickly, it may need adjustment.

Maintenance Tips:

  • Clean the arm and barrel using a dry cloth.
  • Adjust the tension screw according to the manufacturer’s instructions.
  • Listen for unusual noises, which may indicate internal wear.

Door closers should be checked annually or more frequently in high-use doors.

6. Check Weatherstripping and Seals

Weatherstrips keep out drafts, insects, and water, but over time, they wear down or loosen.

Inspection Steps:

  • Run your hand along the seals to feel for gaps or cracks.
  • Replace any worn strips using compatible adhesive-backed weatherstrips.
  • Ensure the strip around the bottom sweep isn’t dragging or detached.

Weatherstripping should be replaced every 2–3 years, or sooner if damaged

.

7. Watch for Rust and Corrosion

Even rust-resistant doors can develop corrosion, especially in coastal regions or where maintenance is irregular.

Treatment Tips:

  • Use a rust-inhibiting primer or rust converter for minor spots.
  • Lightly sand the affected area and touch up with matching paint.
  • For severe corrosion, consult a professional to assess structural integrity.

Regular inspections especially after rain can help catch early signs of rust.

8. Protect the Door from Harsh Elements

Your security screen door is built to last, but weather exposure can accelerate wear.

Tips:

  • Install an overhead awning to shield from direct rain and UV rays.
  • Keep nearby sprinkler systems aimed away from the door.
  • In coastal areas, rinse the door monthly with fresh water to remove salt residue.

These preventive measures help extend the life of coatings and finishes.

9. Secure the Door Properly

Maintenance isn’t only about cleaning. You should also check the structural integrity and fit of the door.

Checklist:

  • Ensure the door fits squarely in the frame and closes snugly.
  • Check that screws and fasteners are tight and not rusted.
  • Make sure the mesh is taut and has no tears or punctures.

A loose-fitting door is not only a security risk but also affects energy efficiency.

10. Schedule a Professional Inspection

While many maintenance tasks can be DIY, a professional service check every 2–3 years ensures all components are functioning optimally.

Experts can:

  • Perform lock diagnostics
  • Re-align doors
  • Replace damaged components
  • Refinish or repaint as needed

This is especially valuable for high-traffic doors or custom installations.

Bonus: Maintain Aesthetic Appeal

Security doesn’t have to mean sacrificing style. Regular polishing and paint touch-ups keep your screen door looking new and increase curb appeal.

  • Use a non-abrasive polish suitable for powder-coated finishes.
  • Touch up any scratched paint with matching enamel to prevent rust.

A well-maintained door adds value to your home and enhances its visual charm.

Final Thoughts

Your security screen door works hard to protect your home return the favor with routine maintenance. With just a little time and attention every few months, you can prevent costly repairs, extend the lifespan of the door, and ensure your home remains secure.

Whether your door is made of stainless steel, aluminum, or decorative iron, the principles remain the same: clean, inspect, lubricate, and protect.