Custom Doors for Small Spaces: Maximizing Style and Function

When it comes to designing for small spaces, every element matters, and doors are no exception. A thoughtfully designed custom door can completely transform a small area by maximizing both functionality and aesthetics. Whether you’re working with a compact living room, a cozy bedroom, or a narrow hallway, custom doors can help create the illusion of more space while adding a stylish, personalized touch.

In this blog, we’ll explore how custom doors can enhance small spaces by focusing on smart design, space-saving features, and style. Here are a few ways you can maximize style and function with custom doors in small areas.

1. Sliding Doors: Space-Saving and Sleek

One of the most popular choices for small spaces is the sliding door. Unlike traditional hinged doors that swing open, sliding doors glide along a track, saving valuable floor space. These doors can also serve as stylish design features, making them perfect for small rooms that need to make the most of every square foot.

Benefits of Sliding Doors:

No Swing Radius: Since sliding doors don’t require extra room to swing open, they’re ideal for small spaces such as bedrooms, bathrooms, or closets.

Design Flexibility: Sliding doors come in a variety of styles, from sleek glass panels to rustic barn doors, allowing you to match them with your interior decor.

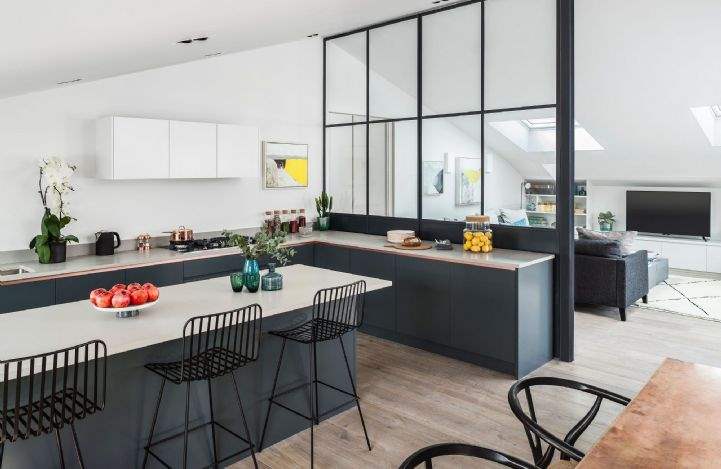
Dual Purpose: Sliding doors can be used to separate spaces while still providing a visual connection, which is especially useful in studio apartments or open-plan living areas.

Popular Choices for Custom Sliding Doors:

Barn Doors: These bring a rustic, chic aesthetic that pairs well with both modern and farmhouse-style interiors.

Glass Panels: Frosted or clear glass sliding doors can help divide rooms without making the space feel smaller or darker.

2. Pocket Doors: Hidden Elegance

Pocket doors are another great custom option for small spaces. Unlike traditional doors that take up space when opened, pocket doors slide into the wall itself, essentially disappearing when not in use. They are particularly useful in areas where space is at a premium, such as bathrooms, laundry rooms, or even closets.

Why Pocket Doors Work for Small Spaces:

No Visible Door: When fully open, pocket doors are hidden inside the wall, giving you full use of the room’s floor space.

Stylish and Subtle: While functional, pocket doors can also be a design element in themselves. You can customize them with materials like wood, glass, or metal to match your home’s style.

Ideal for Tight Corners: Pocket doors can be installed where traditional doors simply wouldn’t work, such as in small entryways or narrow hallways.

Considerations:

Installation: Pocket doors require a bit more work during installation as they need a hollow wall for the door to slide into. However, the space-saving benefits far outweigh the initial effort.

3. Bi-Fold Doors: Compact and Functional

For spaces that need frequent access but don’t have room for a full door, bi-fold doors are an excellent choice. These doors fold in on themselves, taking up very little room when open, making them perfect for closets, pantries, or laundry rooms.

Why Bi-Fold Doors are a Smart Choice:

Minimal Intrusion: Bi-fold doors only require half the space of a traditional door, which makes them a great option for cramped rooms or hallways.

Easy Access: These doors are particularly practical for closets or laundry areas where you need easy access without a door getting in the way.

Custom Design Options: Bi-fold doors can be customized with materials like mirrored panels to help reflect light and create the illusion of a larger space, or with stylish wood finishes that complement your interior design.

Use Bi-Fold Doors for:

Closets and Wardrobes: They allow full access to the contents of a closet without requiring a large opening radius.

Laundry Rooms: In tight spaces, bi-fold doors can be used to neatly conceal a washer and dryer when not in use.

4. Mirrored Doors: Reflecting Light and Space

If you’re dealing with a small space that feels dark or confined, incorporating mirrored custom doors can be a game-changer. Not only do mirrors reflect light, helping brighten a room, but they also create the illusion of more space by reflecting the surrounding area.

Advantages of Mirrored Doors:

Light Reflection: In a small, dark room, mirrors can bounce light around, making the room feel larger and more open.

Space Enhancement: Mirrored doors, especially when used on wardrobes or closets, can visually double the size of a room.

Sleek Look: Mirrored doors provide a modern and clean aesthetic that works well in minimalist, contemporary, or traditional interiors.

Best Applications for Mirrored Custom Doors:

Closets: Mirrored closet doors are a great way to add both functionality and style to a bedroom or hallway, helping the space feel more open.

Bathrooms: A mirrored sliding or bi-fold door can serve as both a space-saving solution and a full-length mirror for small bathrooms.

5. Dutch Doors: Multifunctional Charm

For spaces where you need to separate areas but still want a sense of connection, Dutch doors—doors split horizontally into two halves—are a stylish and functional choice. You can open the top half while keeping the bottom half closed, which is great for rooms where you need a barrier without fully closing off the space.

Benefits of Dutch Doors:

Ventilation and Light: Dutch doors allow for air circulation and light to pass through while maintaining a level of separation, which is useful in spaces like kitchens or playrooms.

Multifunctionality: These doors can be used for practicality (such as keeping pets or small children contained) while still maintaining an open and airy feel.

Charming Aesthetic: Dutch doors add a classic, cottage-like charm to any home, and they can be customized to suit a variety of styles, from modern to rustic.

Ideal Uses:

Kitchens: Keep the lower half closed to keep pets out while still allowing conversation and visibility between rooms.

Home Offices: Dutch doors in a home office can provide privacy while still allowing for communication with family members.

Conclusion

When dealing with small spaces, custom doors offer the perfect solution for maximizing both style and function. From the sleek design of sliding doors to the hidden elegance of pocket doors, each option brings its own unique set of benefits. Bi-fold doors help conserve space in cramped areas, mirrored doors reflect light to create the illusion of a larger room, and Dutch doors add charm while keeping areas partially open.

The key to maximizing small spaces is to choose the right custom door that balances functionality with your personal style. Whether you’re looking to save floor space, increase light, or add a touch of personality, custom doors can transform any small space into a more efficient and stylish area.

A Guide on the Different Parts of an Entry Door

The entry door to your home is much more than just an access point; it plays a crucial role in security, insulation, and curb appeal. Understanding the different parts of an entry door can help you make informed decisions whether you’re installing a new door, upgrading, or performing maintenance. Knowing these components also ensures that you can describe and address issues accurately when consulting with professionals.

In this comprehensive guide, we will break down the various parts of an entry door, explaining their functions and why they matter.

1. The Door Slab

The door slab is the actual door itself—the large, flat, solid piece that opens and closes. It can be made from various materials, each offering its own set of advantages and disadvantages. Common materials include:

Wood: Traditional and aesthetically pleasing, wood doors offer excellent insulation but require more maintenance to prevent warping, rotting, or cracking.

Fiberglass: Durable and low-maintenance, fiberglass doors mimic the appearance of wood without the same vulnerability to moisture.

Steel: Strong and secure, steel doors are excellent for security purposes, though they can dent or rust over time.

Glass Panels: Some doors feature glass inserts for decorative purposes and to allow natural light. These may be part of the door slab itself or installed in an additional frame.

2. Door Frame

The door frame is the structure that supports and encloses the door slab. It consists of several components:

Jambs: The vertical sides of the door frame. They provide support for the door and ensure it swings properly. A door typically has two jambs, one on the hinge side and one on the latch side.

Head Jamb: The horizontal piece at the top of the door frame. It connects the two side jambs and offers additional support to the structure.

Sill (Threshold): The bottom part of the door frame that sits under the door. The sill helps prevent air, water, and insects from entering the home. In some cases, the threshold may be adjustable to enhance weatherproofing.

The door frame plays a critical role in how well the door functions and seals. A poorly installed frame can lead to gaps that let in drafts or water.

3. Hinges

Hinges are the metal pieces that attach the door slab to the frame and allow the door to swing open and closed. Most entry doors have three or more hinges to distribute the weight evenly and ensure stability.

Hinges come in different finishes to match the style of the door and hardware. They also vary in size and design, depending on the material of the door. Heavy doors, like those made of steel or wood, often require sturdier, larger hinges to support their weight.

Butt Hinges: These are the most common type of hinges for entry doors and are available in both fixed-pin and removable-pin varieties.

Ball-Bearing Hinges: Designed for heavy-duty use, ball-bearing hinges reduce friction, making them a great choice for heavy doors.

Properly functioning hinges ensure the door swings smoothly and remains aligned within the frame.

4. Weatherstripping

Weatherstripping is a crucial component that lines the door frame to create a seal when the door is closed. It helps prevent air drafts, water infiltration, and noise, improving the energy efficiency of your home. Common types of weatherstripping include:

Compression Weatherstripping: Installed on the door’s bottom, sides, and top, it compresses when the door closes to form a tight seal.

Sweeps: These are long strips attached to the bottom of the door to block air and moisture from entering through the gap between the door and the threshold.

Over time, weatherstripping can wear out and lose its effectiveness, so it’s important to inspect and replace it periodically.

5. Lockset

The lockset is the hardware that secures the door. It includes the lock, latch, and sometimes a handle or knob. There are many types of locksets, each offering different levels of security and convenience.

Deadbolt: The most secure type of lock for an entry door, deadbolts extend a solid metal bolt into the door frame. Single-cylinder deadbolts are operated by a key on the outside and a thumb-turn on the inside. Double-cylinder deadbolts require a key on both sides for added security.

Handle Sets: These include both a handle for opening the door and a lock, often integrated with a deadbolt. Handle sets can be decorative and come in various finishes and styles to complement your door.

Mortise Locks: These locks are installed inside a pocket (or mortise) cut into the door and are known for their strength and durability. They are typically found on older or more traditional doors.

A reliable lockset is essential for your home’s security, and choosing the right type depends on your personal preference for aesthetics and safety.

6. Strike Plate

The strike plate is a metal plate installed on the door jamb where the latch or deadbolt engages. When the door is closed and locked, the bolt or latch fits securely into the hole in the strike plate, ensuring the door stays shut. Strike plates can vary in size and strength:

Standard Strike Plate: Installed with most entry doors, these plates ensure the latch bolt properly aligns with the door frame.

Reinforced Strike Plate: For added security, a reinforced strike plate is larger and sturdier, distributing force more evenly in the event of an attempted break-in.

A high-quality strike plate can significantly increase the security of an entry door, making it more resistant to forced entry.

7. Door Sweep and Bottom Rail

The door sweep is attached to the bottom edge of the door slab and helps keep out drafts, dirt, and moisture. It works in tandem with the threshold to ensure a tight seal between the door and the floor. Sweeps can be made of rubber, vinyl, or metal, and are available in various designs to match your door’s style.

The bottom rail is the horizontal section of the door slab near the base. It provides structural integrity and ensures the door closes evenly. The bottom rail, in combination with the sweep and threshold, plays a key role in insulation and weather resistance.

8. Glass Panels and Sidelights

Many entry doors feature decorative or functional glass panels, which can be located in the door itself or in the frame beside it, known as sidelights.

Glass Inserts: These are built into the door slab and can range from small windows to large, full-length panels. Some glass inserts may be decorative, featuring stained glass or etched designs, while others are purely functional, allowing light to enter the home.

Sidelights: Vertical glass panels installed on one or both sides of the door. They provide additional natural light and a more open feel to the entryway.

Transom Windows: Positioned above the door, transom windows allow even more light to filter through.

For security purposes, it’s important to ensure that any glass in your entry door is tempered or reinforced to prevent break-ins.

9. Casing and Trim

The casing is the decorative molding that surrounds the door frame on both the interior and exterior sides. The primary purpose of the casing is aesthetic, covering the gaps between the door frame and the wall while giving the door a finished look.

Exterior Trim: The trim outside the door adds to the curb appeal and protects the door frame from the elements.

Interior Trim: Inside, the trim contributes to the room’s design and aesthetic continuity.

An entry door is composed of various components, each playing an essential role in its functionality, security, and appearance. Understanding the different parts of your entry door helps you make informed decisions when choosing, maintaining, or repairing your door. From the sturdy door slab to the secure lockset and the decorative casing, each piece works together to create a safe and welcoming entrance to your home.

How to Fix a Gap at the Bottom of an Exterior Door

A gap at the bottom of an exterior door can lead to drafts, increased energy bills, and even unwanted pests. Addressing this problem not only improves the comfort and energy efficiency of your home but also adds to its security. In this blog, we’ll guide you through various methods to fix a gap at the bottom of an exterior door, ensuring a snug fit and a more energy-efficient home.

Identify the Cause of the Gap

Before jumping into a solution, it’s important to understand why the gap is there. There could be several reasons:

Worn or Damaged Weatherstripping: Over time, weatherstripping can wear out, leading to gaps.

Settling of the House: Homes naturally settle over time, and this can shift doors out of alignment.

Door Warping: Changes in temperature and humidity can cause a wooden door to warp, leading to uneven gaps.

Incorrect Door Installation: If the door was not installed properly, it might leave gaps at the bottom.

Once you’ve identified the cause, you can move on to choosing the most appropriate fix.

Measure the Size of the Gap

Before you start, it’s important to measure the size of the gap. This will help you choose the right materials and methods for fixing the issue. To measure the gap:

Close the door and use a tape measure or ruler to determine how wide and long the gap is.

Ensure you measure across the entire width of the door, as the gap may be uneven.

Once you have the measurements, you can proceed with the most suitable repair method.

Replace or Add Weatherstripping

One of the simplest solutions is to replace or add weatherstripping to the bottom of the door. Weatherstripping is designed to create a seal between the door and the threshold, preventing drafts and heat loss.

Types of Weatherstripping: There are several types of weatherstripping to choose from:

Adhesive-backed foam weatherstripping: This is the easiest to install and can be applied directly to the bottom of the door.

Rubber or vinyl strips: These offer a more durable solution and are often attached to the door using screws or adhesive.

Door sweeps: A door sweep is a strip of material (rubber, vinyl, or bristle) attached to the bottom of the door that helps seal the gap.

Installation Steps:

Remove the old weatherstripping, if any.

Clean the surface of the door to ensure the new weatherstripping adheres properly.

Cut the weatherstripping to fit the width of the door.

Attach the new weatherstripping using adhesive or screws, ensuring it covers the gap completely.

Install a Door Sweep

A door sweep is one of the best solutions for larger gaps at the bottom of an exterior door. It not only blocks drafts but also prevents water and insects from entering your home.

Types of Door Sweeps:

Standard Door Sweep: These are made from rubber or vinyl and are attached to the bottom of the door with screws.

Automatic Door Sweep: These are mechanical sweeps that lower when the door closes, sealing the gap, and retract when the door opens.

Brush Door Sweep: A brush sweep has nylon or synthetic bristles, making it ideal for uneven floors.

How to Install a Door Sweep:

Measure the width of the door and cut the sweep to size if needed.

Place the sweep along the bottom of the door, ensuring it covers the entire gap.

Mark the locations where you’ll insert the screws.

Drill small pilot holes at the marked points.

Secure the door sweep to the door using screws. Make sure the sweep makes contact with the floor or threshold without causing difficulty when opening or closing the door.

Adjust the Door Threshold

If the door threshold (the strip at the base of the door frame) is too low or uneven, it may leave a gap at the bottom of the door. Adjusting or replacing the threshold can help close the gap.

Types of Thresholds:

Fixed Threshold: A solid threshold that is not adjustable.

Adjustable Threshold: This allows you to raise or lower the threshold as needed.

How to Adjust the Threshold:

If you have an adjustable threshold, use a screwdriver to turn the screws that adjust the height.

Slowly raise or lower the threshold until it makes contact with the bottom of the door, sealing the gap.

Ensure the door still opens and closes smoothly after the adjustment.

If your threshold is not adjustable, you may need to replace it with a new one that better fits the door and seals the gap.

Use a Door Bottom Seal

A door bottom seal is a flexible strip of material that adheres to the underside of the door. It’s an effective and easy-to-install option to block drafts, water, and pests.

How to Install a Door Bottom Seal:

Purchase a door bottom seal that matches the size of your door.

Clean the bottom of the door to ensure the seal adheres properly.

Peel off the adhesive backing and carefully press the seal into place on the bottom of the door.

Make sure the seal is aligned properly and covers the gap when the door is closed.

Install a Door Shoe

A door shoe is similar to a door sweep, but it wraps around the bottom of the door, offering more protection. It’s especially effective for older doors or doors that experience a lot of wear.

How to Install a Door Shoe:

Measure the width of the door and purchase a door shoe that fits.

Slide the shoe onto the bottom of the door, ensuring it fits snugly.

Secure it in place with screws or adhesive, following the manufacturer’s instructions.

Check for Door Alignment Issues

Sometimes, a gap at the bottom of the door is due to misalignment rather than wear or damage. If the door has shifted due to settling or improper installation, you may need to adjust the door’s position.

Steps to Realign the Door:

Check the hinges to see if they’re loose or misaligned.

Tighten any loose screws on the hinges.

If the door is still misaligned, you may need to remove the door and adjust the hinges or shims to reposition it.

Reinstall the door and check if the gap at the bottom has been eliminated.

Consider Professional Help

If you’ve tried multiple methods and the gap persists, or if the issue is due to door warping or structural problems, it may be time to consult a professional. A contractor or door specialist can assess the problem and provide a long-term solution.

Fixing the gap at the bottom of an exterior door is essential for improving energy efficiency, preventing drafts, and keeping your home secure from pests and weather elements. From simple solutions like weatherstripping and door sweeps to more involved fixes like adjusting the threshold or realigning the door, there are multiple ways to tackle the issue. With the right tools and materials, you can easily close the gap and enjoy a more comfortable home.

Cold Weather: How Does It Affect Your Doors and Windows?

As winter approaches and temperatures drop, the cold weather brings more than just frost and snow. It can also have a significant impact on your home, particularly on your doors and windows. These crucial components of your home’s structure play a vital role in keeping the cold out and maintaining warmth inside. However, cold weather can cause a range of issues that may affect their functionality, energy efficiency, and overall condition. In this blog, we’ll explore how cold weather affects doors and windows, the potential problems it can create, and how you can protect your home during the winter months.

Thermal Expansion and Contraction

One of the most common effects of cold weather on doors and windows is thermal expansion and contraction. Materials like wood, metal, and vinyl expand and contract with temperature fluctuations. In cold weather, materials contract as they lose heat. This contraction can cause several problems:

Drafts and Air Leaks:

As the materials in your doors and windows contract, gaps may form between the frame and the wall, or between the door/window and its frame. These gaps can lead to drafts and air leaks, allowing cold air to enter your home and warm air to escape. This not only makes your home less comfortable but also increases your heating bills.

Difficulty Opening and Closing:

Contraction can cause doors and windows to become misaligned, making them difficult to open or close. You might notice that your door sticks or your windows are harder to slide. This is often due to the materials shrinking and pulling away from their original position.

Warping:

In some cases, the repeated cycle of expansion and contraction can lead to warping. Wood doors and windows are particularly susceptible to this. Warped doors or window frames can result in gaps that are difficult to seal, reducing their effectiveness in keeping out the cold.

Condensation and Moisture Build-Up

Another common issue during cold weather is condensation. When warm, moist air inside your home comes into contact with the cold surfaces of your doors and windows, it cools down and forms water droplets. This condensation can lead to several problems:

Foggy Windows:

If your windows are foggy or have water droplets forming on the inside, it’s a sign of condensation. While it may seem like a minor inconvenience, consistent condensation can lead to more serious issues, such as mold growth and damage to window frames.

Mold and Mildew:

Moisture build-up from condensation creates the perfect environment for mold and mildew to thrive. Mold can cause health problems and deteriorate the materials in your doors and windows, leading to costly repairs or replacements.

Water Damage:

Over time, constant exposure to moisture can cause water damage to your window sills, frames, and even the surrounding walls. This can weaken the structural integrity of your home and lead to further complications down the line.

Cracks and Gaps

Cold weather can also cause cracks and gaps to form in and around your doors and windows. These issues can arise due to a combination of factors, including the natural aging of materials, the stress from thermal expansion and contraction, and the effects of moisture:

Cracked Caulking and Seals:

The caulking and seals around your windows and doors are designed to keep air and moisture out. However, in cold weather, these materials can become brittle and crack. Once cracks form, they allow cold air to seep in, reducing the energy efficiency of your home.

Gaps in Weatherstripping:

Weatherstripping is another critical component that helps keep your home insulated. In cold weather, weatherstripping can shrink or deteriorate, leading to gaps that allow drafts to enter. Replacing damaged weatherstripping is essential to maintain a tight seal around your doors and windows.

Cracks in Glass:

Extreme cold can cause the glass in your windows to crack, especially if there are already small imperfections or weaknesses. Cracked glass not only compromises the insulation properties of your windows but also poses a safety risk.

Energy Efficiency and Heating Costs

The combined effects of drafts, air leaks, and moisture build-up can have a significant impact on the energy efficiency of your home. When your doors and windows are not properly sealed, your heating system has to work harder to maintain a comfortable indoor temperature. This leads to higher energy consumption and increased heating bills.

Poorly insulated windows and doors can also make certain areas of your home feel colder, creating uneven heating and making it difficult to keep your home comfortable during the winter. To improve energy efficiency and reduce heating costs, it’s important to address any issues with your doors and windows before the cold weather sets in.

How to Protect Your Doors and Windows in Cold Weather

Fortunately, there are several steps you can take to protect your doors and windows from the effects of cold weather and ensure they function properly throughout the winter:

Inspect and Repair:

Before the cold weather arrives, inspect your doors and windows for any signs of damage, such as cracks, gaps, or deteriorating seals. Address any issues promptly by repairing or replacing damaged components.

Seal Gaps and Cracks:

Apply caulking to any gaps or cracks around your windows and doors to prevent air leaks. Ensure that the caulking is flexible and designed for outdoor use, as it needs to withstand temperature fluctuations.

Replace Weatherstripping:

Check the weatherstripping around your doors and windows and replace it if it’s damaged or worn out. Weatherstripping is relatively inexpensive and can make a significant difference in keeping your home insulated.

Upgrade to Double-Glazed Windows:

If your windows are single-pane, consider upgrading to double-glazed windows. Double-glazed windows provide better insulation by trapping air between two layers of glass, reducing heat loss and minimizing condensation.

Use Door Sweeps and Draft Stoppers:

Install door sweeps on exterior doors to block drafts from entering underneath. You can also use draft stoppers for windows and doors to further reduce air leakage.

Consider Storm Doors and Windows:

Installing storm doors and windows adds an extra layer of protection against the cold. These additional doors and windows help to insulate your home by creating a buffer zone between the outside and inside.

Maintain Proper Ventilation:

While it’s important to keep the cold out, maintaining proper ventilation is also crucial to prevent moisture build-up. Use exhaust fans in kitchens and bathrooms to reduce indoor humidity, and consider using a dehumidifier in particularly damp areas.

Regular Maintenance:

Regularly maintain your doors and windows by cleaning them and checking for any signs of wear and tear. Lubricate hinges, locks, and tracks to ensure smooth operation even in cold weather.

Cold weather can have a profound impact on your doors and windows, affecting their performance, energy efficiency, and longevity. From thermal expansion and contraction to condensation and moisture build-up, the winter season presents a variety of challenges for these critical components of your home. By taking proactive steps to inspect, repair, and protect your doors and windows, you can minimize the negative effects of cold weather and keep your home warm, comfortable, and energy-efficient throughout the winter.

How to Know When It’s Time to Repair or Replace Your Windows

Windows play a crucial role in your home’s comfort, energy efficiency, and aesthetic appeal. Over time, they can develop issues that compromise their functionality and effectiveness. Deciding whether to repair or replace your windows is a significant decision that depends on several factors. This guide will help you understand when it’s time to repair or replace your windows and how to make the best choice for your home.

1. Assessing the Condition of Your Windows

The first step in determining whether to repair or replace your windows is to assess their current condition. Look for signs of wear and tear, such as:

Drafts: If you feel a draft near your windows, even when they’re closed, it could indicate that the seals are failing or that there are gaps in the frame. This can lead to higher energy bills as your heating and cooling systems work harder to maintain a comfortable temperature.

Difficulty Opening or Closing: Windows that are difficult to open or close may have warped frames, broken hardware, or misalignment. This not only affects their functionality but also poses a safety risk in case of emergencies.

Condensation Between Panes: Condensation or fogging between the glass panes of double- or triple-glazed windows indicates a broken seal. This reduces the insulating properties of the window and can lead to further deterioration.

Visible Damage: Cracks, chips, or rot in the window frame or glass are clear signs that your windows are past their prime. This type of damage can compromise the structural integrity of the window and may lead to more significant issues if not addressed promptly.

2. Understanding the Benefits of Repairing Your Windows

In some cases, repairing your windows can be a cost-effective solution that extends their lifespan without the need for a full replacement. Consider repairing your windows if:

The Damage Is Minor: Small issues like worn-out weatherstripping, minor frame damage, or a broken pane of glass can often be repaired without replacing the entire window. These repairs are typically less expensive and can restore the window’s functionality.

The Windows Are Relatively New: If your windows are less than 10-15 years old and still in good condition overall, repairing them may be the best option. Modern windows are designed to last for several decades, so it’s worth investing in repairs if they’re still within their expected lifespan.

You Want to Preserve the Original Character: In older homes, the windows may be a key part of the architectural style and historical value. In such cases, repairing the original windows can help preserve the home’s character while improving their performance.

3. When to Consider Replacing Your Windows

While repairs can be effective in many situations, there are times when replacing your windows is the better long-term solution. Here are some indicators that it’s time for a replacement:

Frequent Repairs Are Needed: If you find yourself constantly repairing your windows, it may be more cost-effective to replace them. Frequent repairs can add up over time, and new windows will provide better energy efficiency and functionality.

Significant Energy Loss: Old or damaged windows can be a major source of energy loss, leading to higher heating and cooling costs. If your energy bills are rising and you suspect your windows are to blame, replacing them with energy-efficient models can save you money in the long run.

Extensive Frame Damage: Windows with extensive rot, warping, or structural damage to the frames are often beyond repair. In such cases, replacing the windows is necessary to ensure the safety and integrity of your home.

Outdated Windows: If your windows are outdated, replacing them can significantly improve your home’s curb appeal and increase its value. Modern windows come in a variety of styles and materials, offering better energy efficiency, noise reduction, and ease of maintenance.

Condensation and Fogging: Persistent condensation or fogging between glass panes indicates that the seal has failed, and the insulating gas has escaped. This issue cannot be repaired and requires window replacement to restore the window’s insulating properties.

4. Types of Replacement Windows

If you’ve decided that window replacement is the best option, it’s important to choose the right type of windows for your home. Consider the following options:

Single-Hung and Double-Hung Windows: These are classic window styles that operate vertically. Double-hung windows allow both the upper and lower sashes to open, providing better ventilation.

Casement Windows: Hinged on one side, casement windows open outward like a door. They offer excellent ventilation and an unobstructed view.

Sliding Windows: These windows open horizontally by sliding along a track. They are ideal for spaces where you need a wider opening.

Bay and Bow Windows: These window styles project outward from the exterior wall, creating a small nook inside the room. They add architectural interest and provide a panoramic view.

Awning Windows: Hinged at the top, awning windows open outward, allowing for ventilation even during light rain.

Picture Windows: Fixed windows that do not open, picture windows provide a clear view and allow maximum natural light into the room.

5. Energy Efficiency Considerations

When replacing your windows, energy efficiency should be a top priority. Energy-efficient windows can significantly reduce your heating and cooling costs and make your home more comfortable. Look for windows with:

Low-E Glass: Low-emissivity (Low-E) glass has a special coating that reflects heat back into your home during the winter and keeps it out during the summer, improving insulation.

Double or Triple Glazing: Windows with two or three layers of glass provide better insulation than single-pane windows. The space between the panes is often filled with argon or krypton gas, which further enhances energy efficiency.

Energy Star Certification: Energy Star-certified windows meet strict energy efficiency guidelines set by the U.S. Environmental Protection Agency. Choosing Energy Star windows ensures that you’re getting a product that will help reduce your energy bills.

6. Cost Considerations and ROI

Replacing windows can be a significant investment, but it’s important to consider the long-term benefits and return on investment (ROI). New windows can:

Increase Property Value: High-quality, energy-efficient windows can increase your home’s market value and make it more attractive to potential buyers.

Lower Energy Bills: Energy-efficient windows can reduce your heating and cooling costs, providing long-term savings that offset the initial investment.

Improve Comfort: New windows eliminate drafts, reduce noise, and enhance the overall comfort of your home.

7. Professional Installation Matters

Whether you’re repairing or replacing your windows, professional installation is crucial to ensure the best results. Poorly installed windows can lead to air leaks, water damage, and reduced energy efficiency. When hiring a professional, make sure to:

Check Credentials: Verify that the installer is licensed, insured, and has a good reputation in the industry.

Get Multiple Quotes: Obtain quotes from several contractors to ensure you’re getting a fair price for the work.

Ask for References: Request references from past clients to gauge the quality of the installer’s work.

Deciding whether to repair or replace your windows depends on several factors, including the condition of your windows, your budget, and your long-term goals for your home. By carefully assessing the situation and considering the benefits of each option, you can make an informed decision that enhances the comfort, energy efficiency, and value of your home. Whether you choose to repair or replace, proper maintenance and professional installation will ensure your windows serve you well for years to come.